Showing posts with label DIY. Show all posts

Thursday, January 9, 2014

Hand Crafted Soap

I told you guys last month that I would share some pictures of my adventures in soap making from the holidays.  Since this was my first time making soap, I decided that it would be prudent to make it with a friend. My friend, Andrea, and I have been planning on making homemade soap for an entire year and the holidays seemed like a good reason to prod us to get into action. I did not take pictures during the process, but the next time I make soap, I will try to be more diligent in doing so.

I did however, take pictures during the cooling process of the soap and when I was cutting it. Here is the finished product first.


This is the soap after I cut it into bars. It is a really dark yellow color in the pictures. Kinda gross looking, but in 4 weeks these bars dry out into a nice creamy white color. 

This is a close up of the soap after it was poured into my mold. This photo was probably taken 24 hours after the soap was poured.  You can see that the top layer is a nice creamy white color. This is what it looked like closer to when all of the bars had dried out. You can think of it like a cheese rind. The outer layer is hard, but the inside still is soft and pliable.  


Since this was my first attempt at making soap, I decided to go cheap with the mold. My molds were repurposed heavy whipping cream containers, which are conveniently made from a waxed paper-like substance. I tore off the paper and here is what I got. I then cut the soap into about 1 inch thick bars. 

My bars came out all crooked because I couldn't cut through the soap straight. Next time, I will mark lines on all sides of the mold to cut a straighter bar. I will also cut the bars while they are still in the paper mold. 

Can you see that the inside of the soap is much darker than the outer sides? This is what I mean by it having a cheese like rind. When it is done curing, the entire bar will be an ivory color because I did not add any fragrances or color. 

If you are interested in making your own soap, here is an amazing tutorial on soapmaking. Remember that when making soap, lye is involved and it is important to take safety precautions such as wearing rubber gloves and safety goggles. Also, always do your own research regarding the soap making process. There is a lot of information on the web, but you can also find soapmaking books at your local library.


Jess

Tuesday, October 8, 2013

Finished Picture Frame Reveal/ Fair Weekend

Over the weekend I didn't get a lot finished, but I did get to pick up one of these. 
source

It's called a tack puller. It is REALLY useful tool for stripping a piece of furniture. Stripping furniture takes a lot more time than you would imagine because you have to get every S-I-N-G-L-E tack or staple out of the frame.  If you do not have a tack puller, a flat head screw driver will be sufficient, but it will go A LOT slower. Trust me on this one. 
I couldn't find one at my local walmart or Lowes, but I finally found one at my local lumber store. I purchased my tack puller for under $5. 

xxxxxxxxxxxxxxxxxxxxxxxxxxxxxxxxxxxxxxxxxxxxxxxxxxxxxxxxxxxxxxxxxxxxxxxxxxxxxxxxx

I also finished the chalkboard picture frame. 


The paint has to cure for a week, so I cannot test it out just yet. I am sure this will become filled with my beloved children's artwork.

The "fishbowl" is filled with unrippened persimmons and pinecones. The pumpkin came from my grandfather's garden. He's such a great gardener.


He even won the 1st place ribbon for the best giant pumpkin in the parish fair. 


 I thought I'd sneak in a photo of the kids riding the cars at the fair. You can't make out the expression on my 7 year old daughter's face, but I don't think she's too happy riding on this kiddie ride. My younger daughter and oldest son were thrilled with it though. 


Tuesday, October 1, 2013

Picture Frame & Chalk Paint

Today was one of those days that I felt highly unproductive. I did get a lot accomplished...just not the fun stuff! 

The other day I gave you a preview of the picture and frame that I was going to paint. 


Here is a better photo of it. I have been scouring the thrift shops around town for about a month for a big frame. I really did not care if it had glass in the frame. I wanted to create a more appealing way to showcase the children's artwork...ya know...instead of using the refrigerator door. Don't get me wrong, I don't mind using the refrigerator door to display the artwork, but it just won't stay put. It falls off the refrigerator door at least three times a day. Then, it gets stepped on. Finally, it gets torn and I end up sneaking it in the trash before the kids catch me. (Thankfully they're still too little to realize when their artwork is missing.) It just is not the most efficient place to display things on. 

Instead of using this to display the kids' coloring pages, I decided to make a chalkboard out of it. That's very typical of my style...repurposing things...even the already repurposed. 

So here is my progress. 


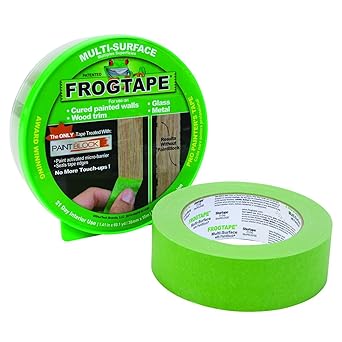
As you can see, I painted the frame black and the mat a silver color. It is actually called champagne. When I started painting it, I didn't have any masking tape, so you can see my painting blunders on the frame. When I made my shopping trip this morning, I made sure to grab some frog tape.


I had to try this tape out for myself because of all the positive reviews that it has been receiving in the blog world. I has not left me disappointed. 

All I have left is to touch up a few places on the frame and then I will paint the inside with chalk paint. 

Monday, September 30, 2013

Biting the Bullet

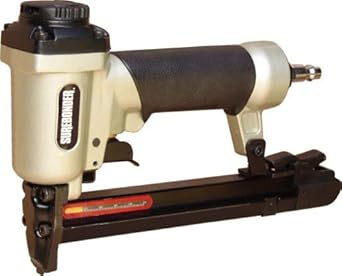
My Mother offered to let the grand babies sleep over this past weekend, which gave me the perfect opportunity to try out this bad boy. 


Yes, I finally bit the bullet and ordered one. Since I am just learning to upholster, I decided this would be a perfect gun for me. The best thing is..it was super affordable and it works great!

I mentioned a while back that I would reupholster the red chair within the month.
 Well, at least I got started within the month.


The chair's burlap needed to replaced on the deck. 


Here's a close up of it freshly stapled in place. 


And here is the front. 
 (Please excuse the mess, I am currently overtaking my living room with my projects.)


I replaced the old cotton batting. 
When I was stripping the chair, I accidentally tore the front batting.
 I hope that won't be a problem when I recover it. 

Hopefully I can manage to get a little more done this week. I'll keep you posted as I go.

Friday, September 27, 2013

MIA & Chalkboards

I know a few of you are wondering where I have been lately? I know...I just got my blog up and running and I am slacking already. I've have had a very busy past few weeks with birthday parties, house hunting, and daily life. Not to mention that it I have been having a few love spats with the camera AND computer. 

I promise that I have some really cool projects coming up.


Like this chalkboard in a picture frame by Miss Mustard Seed. I absolutely have loved this chalkboard and frame since I have first laid eyes on it. 


Here's a sneak peek of my picture with a frame before it is painted. 


Do you recognize the bowl?

Since I am not planning on selling the picture, I will go ahead and tell you that I paid $1 for it. So that means if I mess it up completely I am out an entire $1. No biggie! 


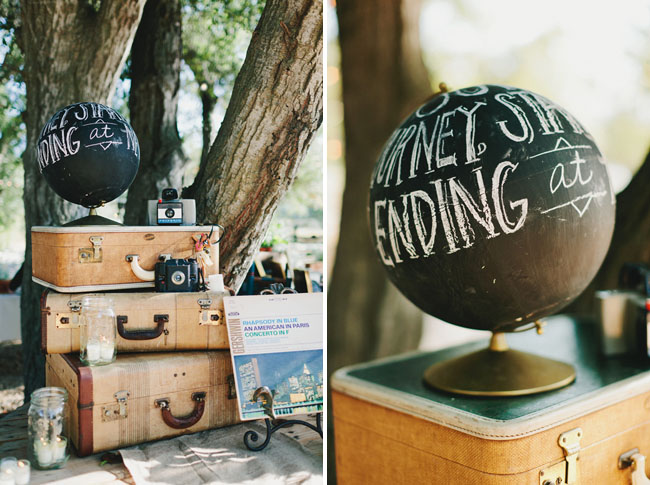
Chalkboards are being used in a number of different ways and are easy to incorporate in any decor.


Just look at this lovely chalkboard globe used as wedding decor. Simply Stunning. 


Entire walls are even being painted in chalk paint, especially in kitchens. There is usually only one accent wall that is painted in chalk paint. In this kitchen, the chalkboard wall complements the white cabinets. 


Well, that's all for me tonight folks! My bed is beckoning me! Have a great weekend!